WARNING
The content of this page is not the up to date version of HAL Robotics documentation.
Official HAL Robotics links:
Documentation
docs.hal-robotics.comDocumentation repo
github.com/HALRobotics/HAL.DocumentationWebsite
hal-robotics.com4. Operator Workflows
4.1. Create a Workflow
4.2. Steps
4.3. Run a Workflow
4.1. Create a Workflow
Objective:
In this tutorial we’ll create an Operator Workflow in decode.
Requirements to follow along:
- HAL Robotics decode installed on a PC. See Installation if you need to install the software.
- An open project
- A Robot in the Scene
- A Controller in the Scene
Background:
Operator Workflows are a set of collaborative work instructions for the operator of a Cell, Robots and any other peripheral devices, like sensors, that need to be controlled or feed into the process.
How to:
From the Workflow Editor screen, click on the three bar menu icon (☰) in the top right-hand corner and Add a New Workflow. You can use the same menu to rename the Workflow, add other Workflows or delete the currently selected Workflow.
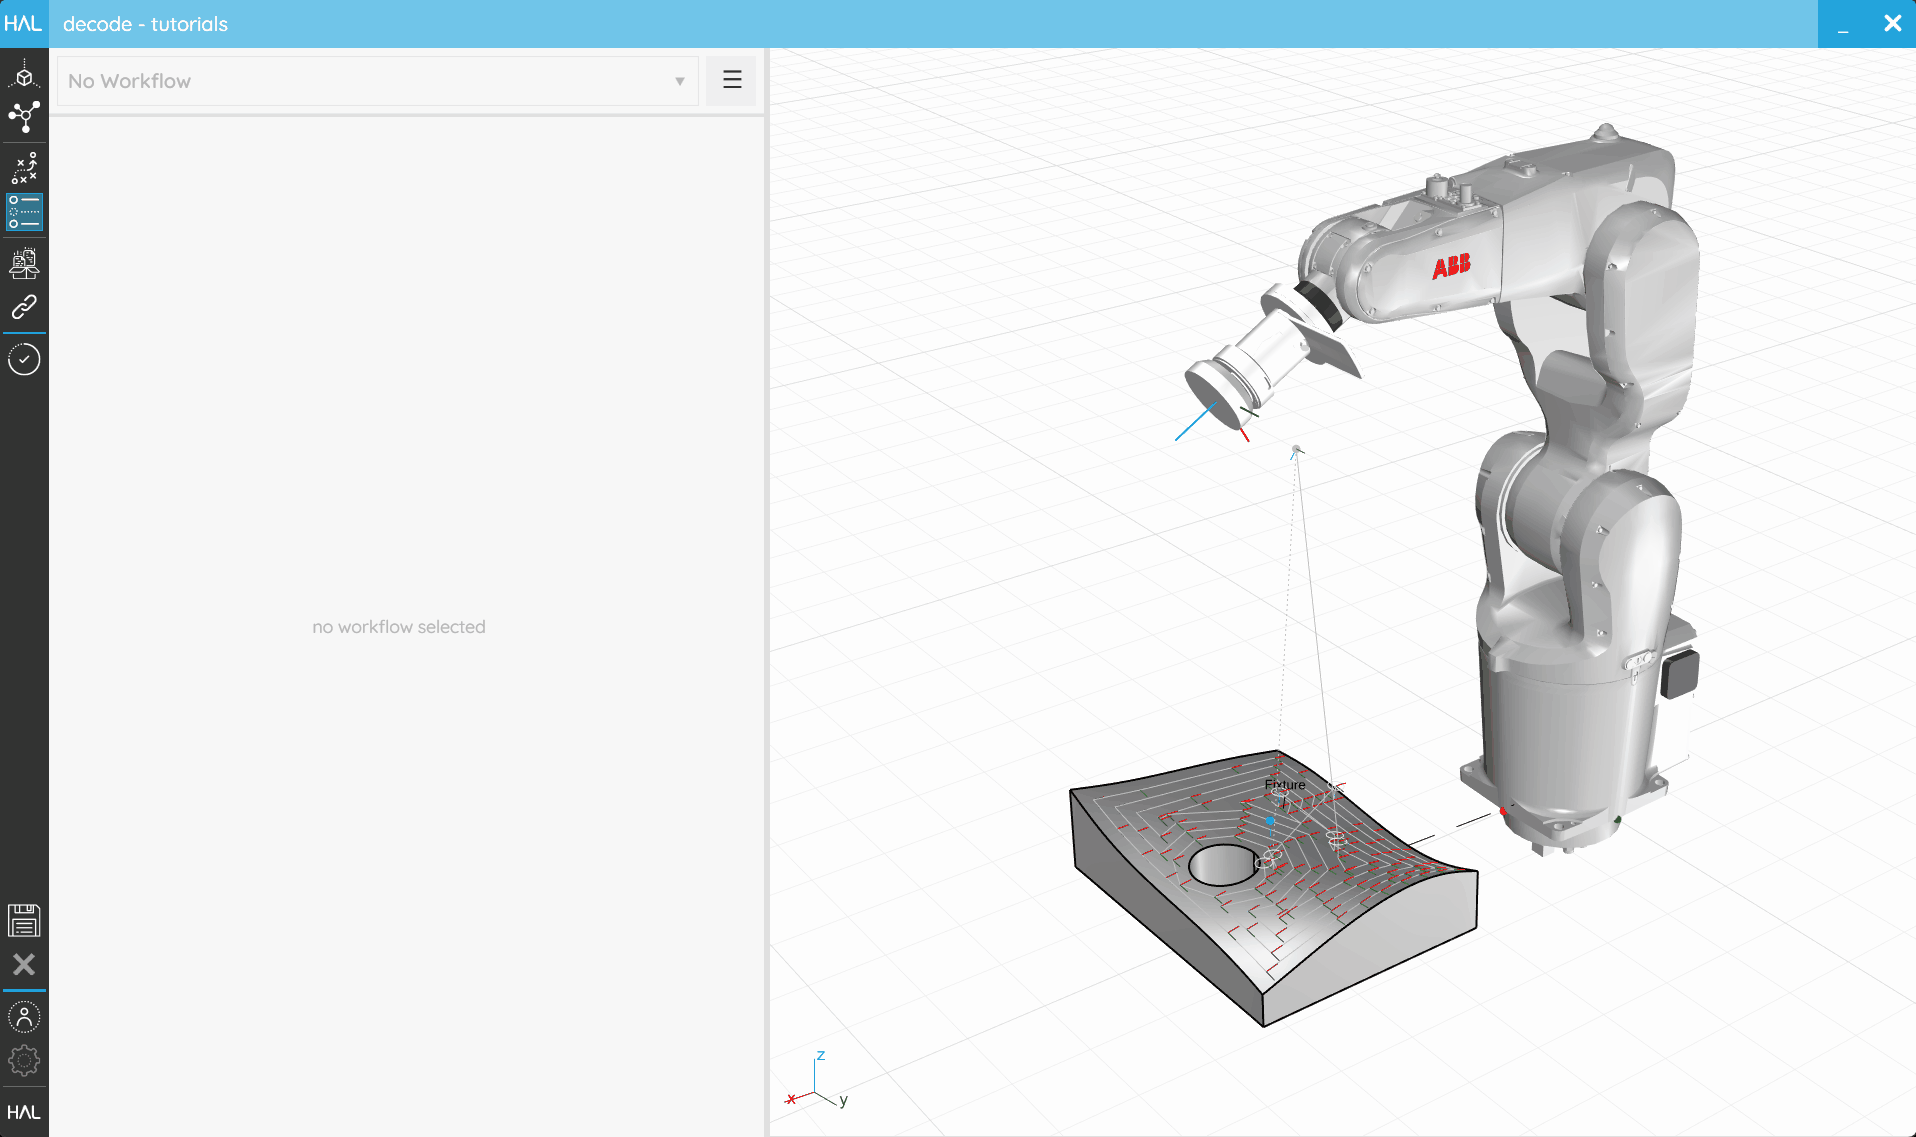 An empty Workflow isn’t very useful but offers a lot of potential.
4.2. Steps
Objective:
In this tutorial we’ll look at the different Steps that can be added to an Operator Workflow in decode.
Requirements to follow along:
- HAL Robotics decode installed on a PC. See Installation if you need to install the software.
- An open project
- A Robot in the Scene
- A Controller in the Scene
- An Operator Workflow
Background:
An Operator Workflow is comprised of a sequence of multiple Steps which create the collaborative work instructions for the Cell and operator. Some Steps are informational, others request information from the operator, run computational tasks, or communicate with devices.
How to:
 Workflows acts a collaborative work instructions for operators and connected devices.
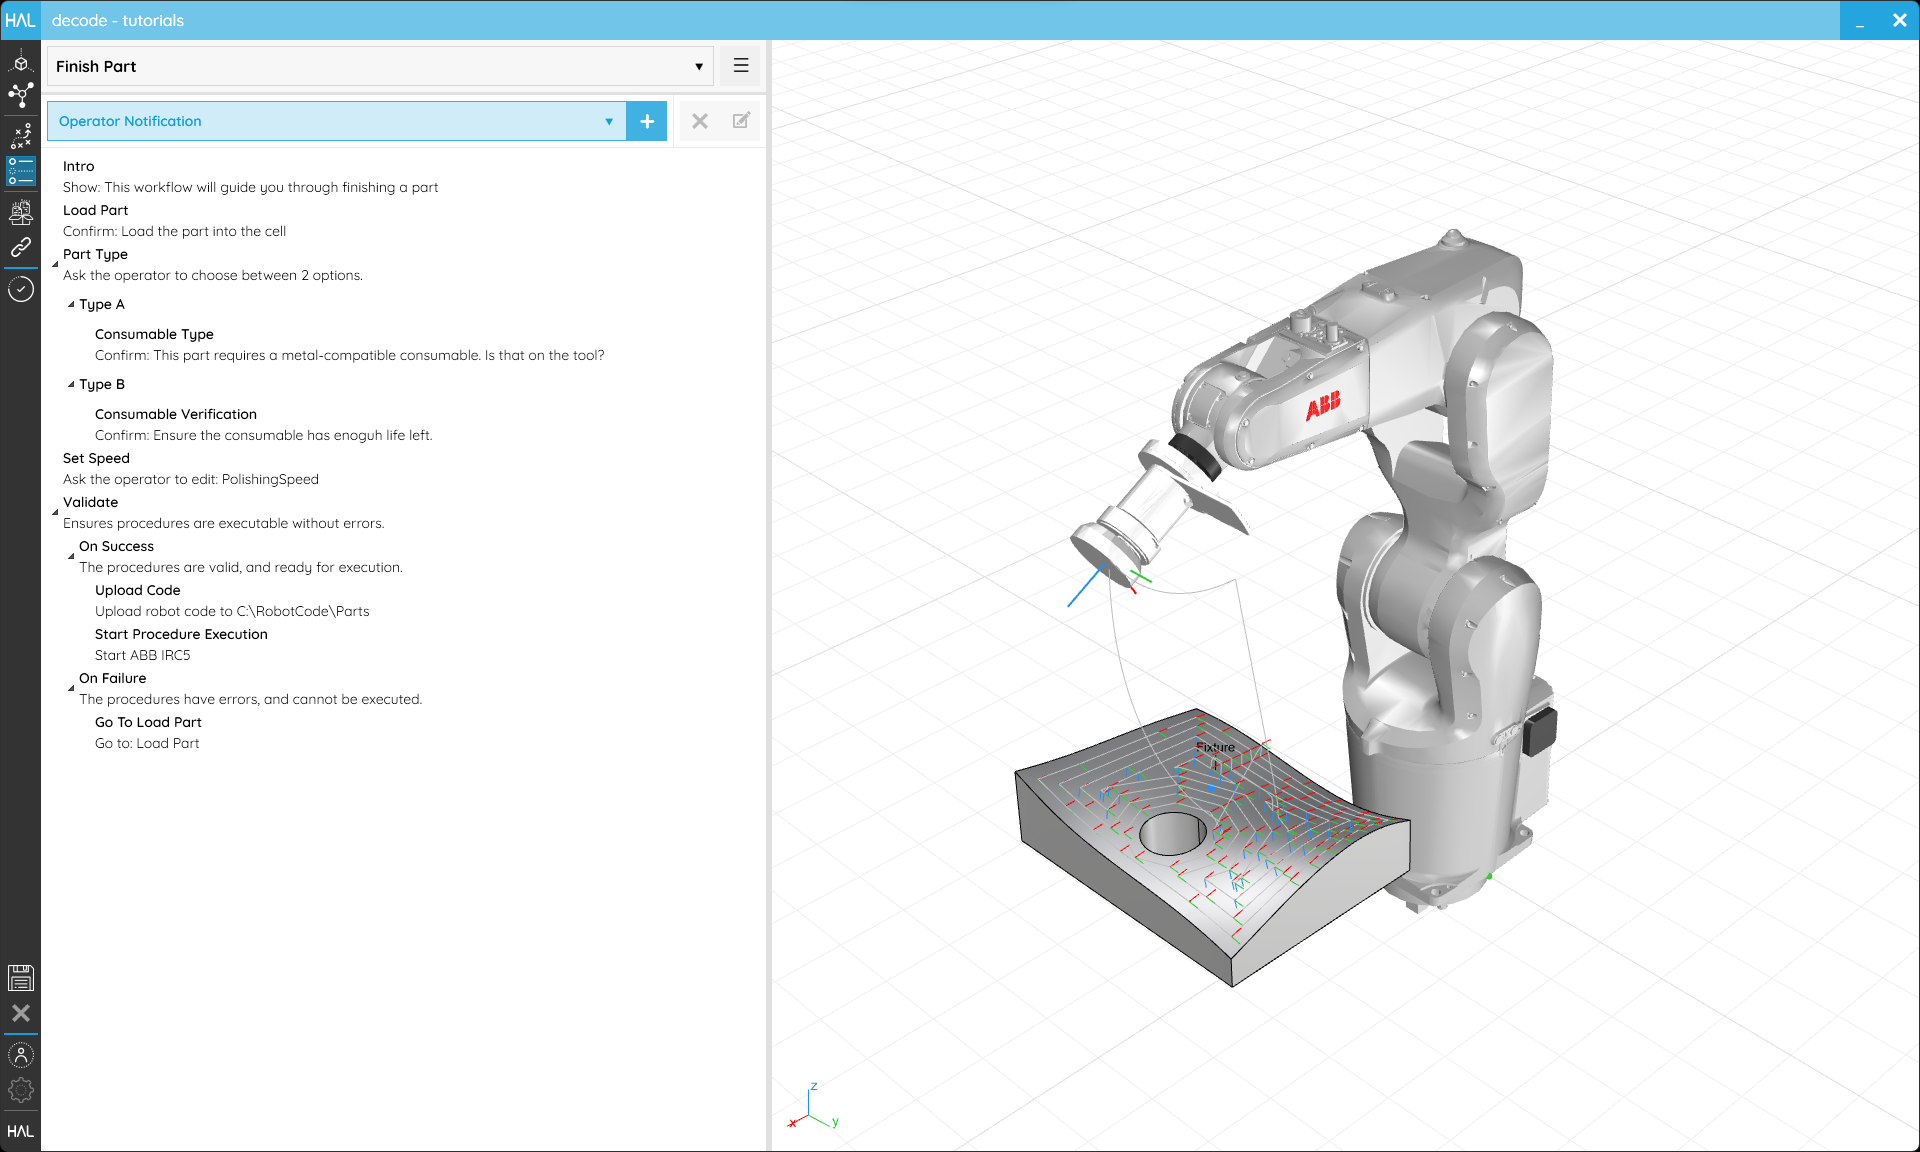
Use the Item Type selector to choose the Step type you want to add and click the + button to add it. As usual, it is highly recommended to assign a useful Name to any Step. The standard Steps and their settings are listed below.
Operator Interactions
- Operator Notification shows a message to the operator which requires no interaction from them. The only setting is the Message they are to be shown. e.g. The robot has finished its process.
- Operator Confirmation shows a message to the operator with a button to confirm before the Workflow proceeds. The settings are a Message to the operator and the Confirm Button Content which is the text on the button they will see. e.g. Load the part into the fixturing and click “Done” once complete. - Done
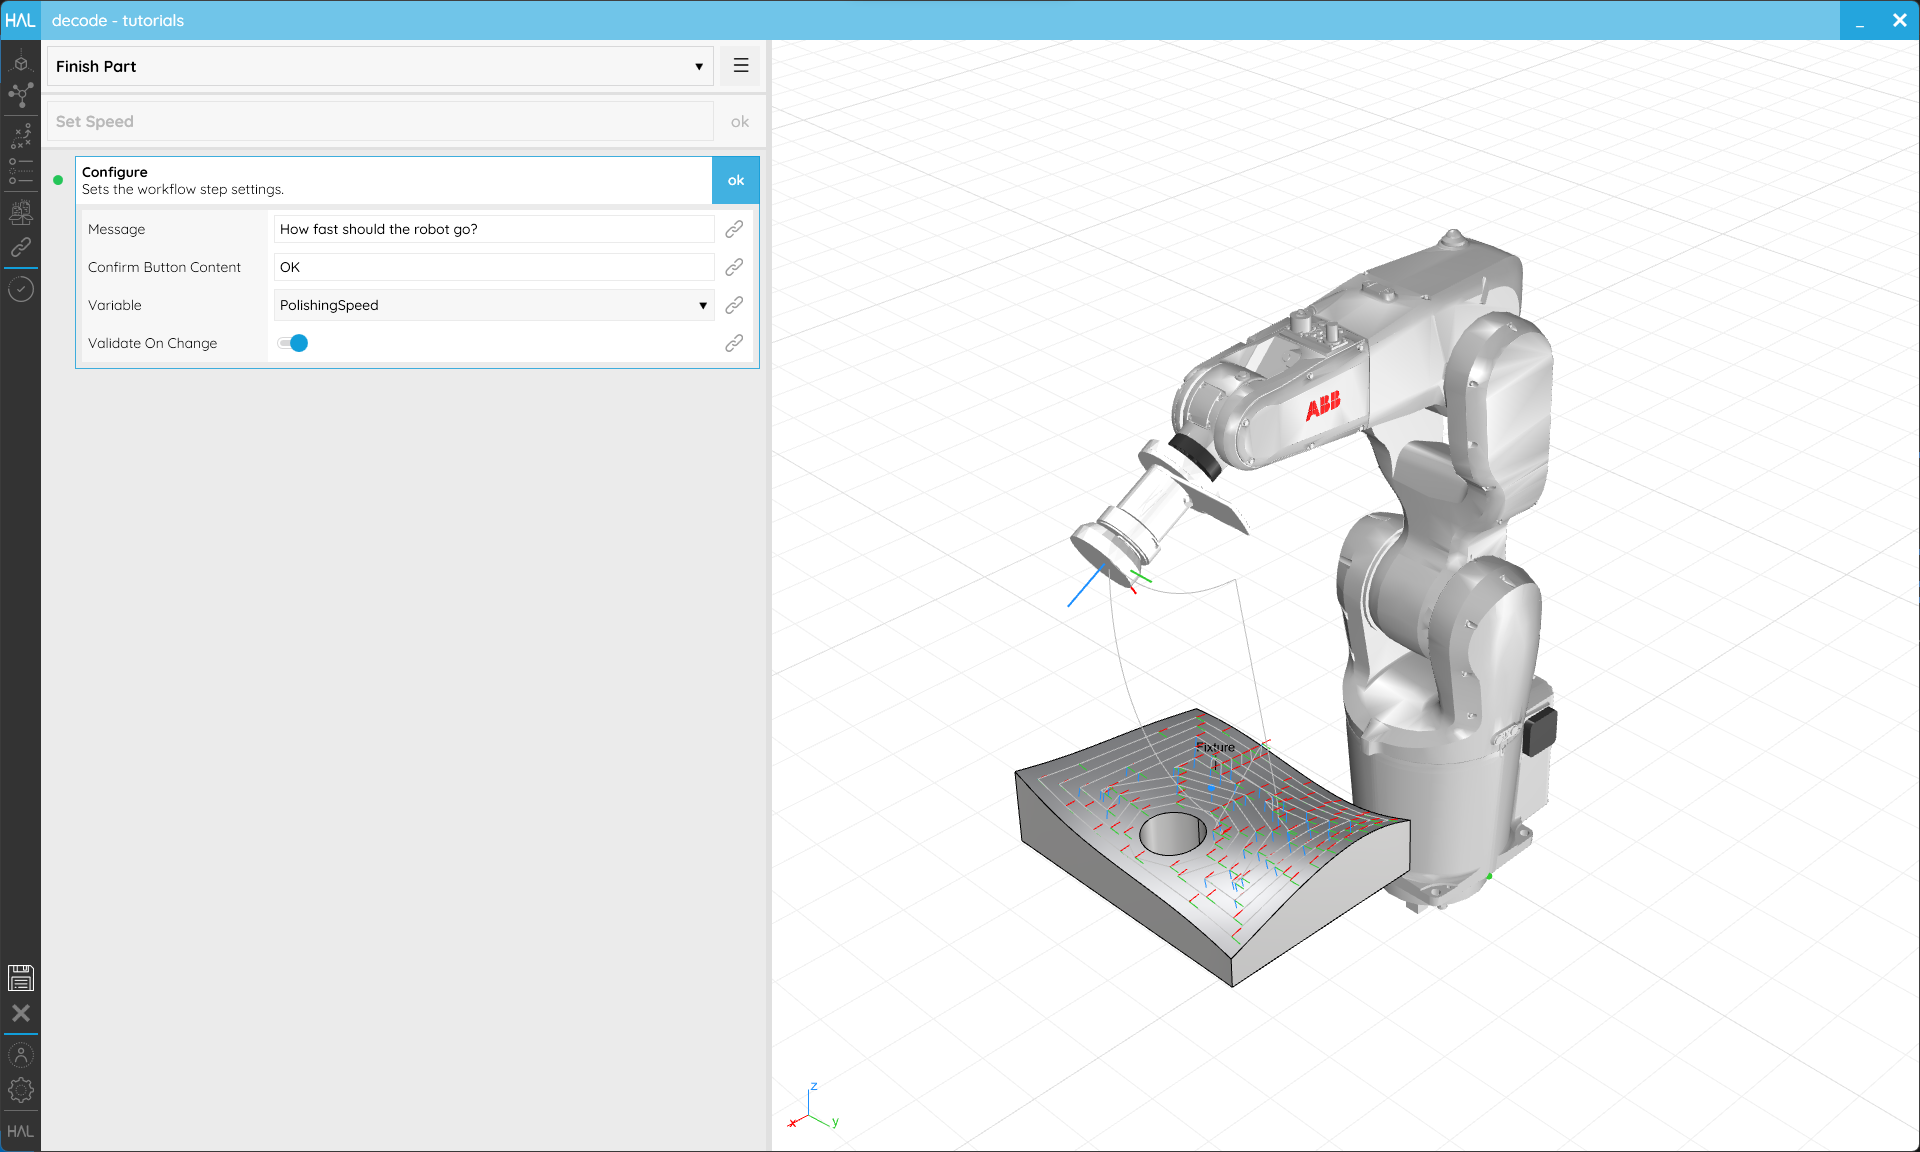
- Operator Input builds on Operator Confirmation and also asks the operator to set the value of a Variable. A selector is shown from which the Variable can be chosen, and if Validate on Change is active, then decode will re-solve the Procedure every time the value is changed by the operator. e.g. How fast should the robot go? - MySpeed Variable - OK
- Operator Choice allows the operator to choose from one or more Options, each of which can branch the Workflow. The new settings here are Minimum and Maximum which specify the minimum and maximum number of Options the operator can select before proceeding. Setting either to
0will allow any number of Options to be a valid selection. Once your Operator Choice has been created, two Options will automatically be generated within it, more can be added by selecting the Operator Choice and clicking the + with Option in the Item Type selector.
 Workflow Steps can ask the operator for input about how the process should work.
 An editor will be shown to the operator when asking for their input.
Non-Interactive
- Set Variable works like an Operator Input but does not prompt the operator. These are envisaged to be most useful within Options but are not limited to that case. If Visible To Operator is activate, the operator will be notified that the value of the Variable has been changed, and told what the new value is. The Value to be set can be changed via the Value edit button.
- Validate will solve the Procedure and has two different Options which allow specifying different Workflow branches depending on whether the solve succeeds or fails. The minimum alert level which counts as a failure can be set in Failure Level.
Structural
- Group allows the logical structuring of Workflows but has no inherent behaviour, exactly like Programming Groups.
- Option can only be added to an Operator Choice and defines a sub-Workflow which can have its own set of Steps which will be executed when the operator chooses that Option. Each Option can be renamed and have a Description added to help the operator.
- On Success and On Failure are essentially Options that are hardcoded into the Validate Step.
- Go To allows the Workflow to return to a previous point. These should only be used in Options to avoid unescapable loops.
Ouputs
N.B. For any of these to run the Procedure must be validated by Validate or _Validate on Change in Operator Input.
- Export Code allows you to Export code to a folder. The Controller, Destination and Mode can be set.
InlineMode will create a dense code file with as little declarative code as possible.Predeclarationmode will do just the opposite, it will create variables wherever possible to make it easier to change things by hand should you want to. For most scenarios we recommendInlineas it produces shorter code and is faster. You can also set what happens once the code is Exported in On Export. - Upload Code allows you to Upload code directly to a Controller. The same settings as Export Code apply but the Destination is on the Controller. Run Automatically will, if possible, start executing the Robot’s Procedure once the Upload completes.
- Set Procedure Execution works just like Run Automatically in Upload Code in Production Mode when set to but will run a simulation in the 3D viewport in Simulation Mode. It will not, however, Upload any code.
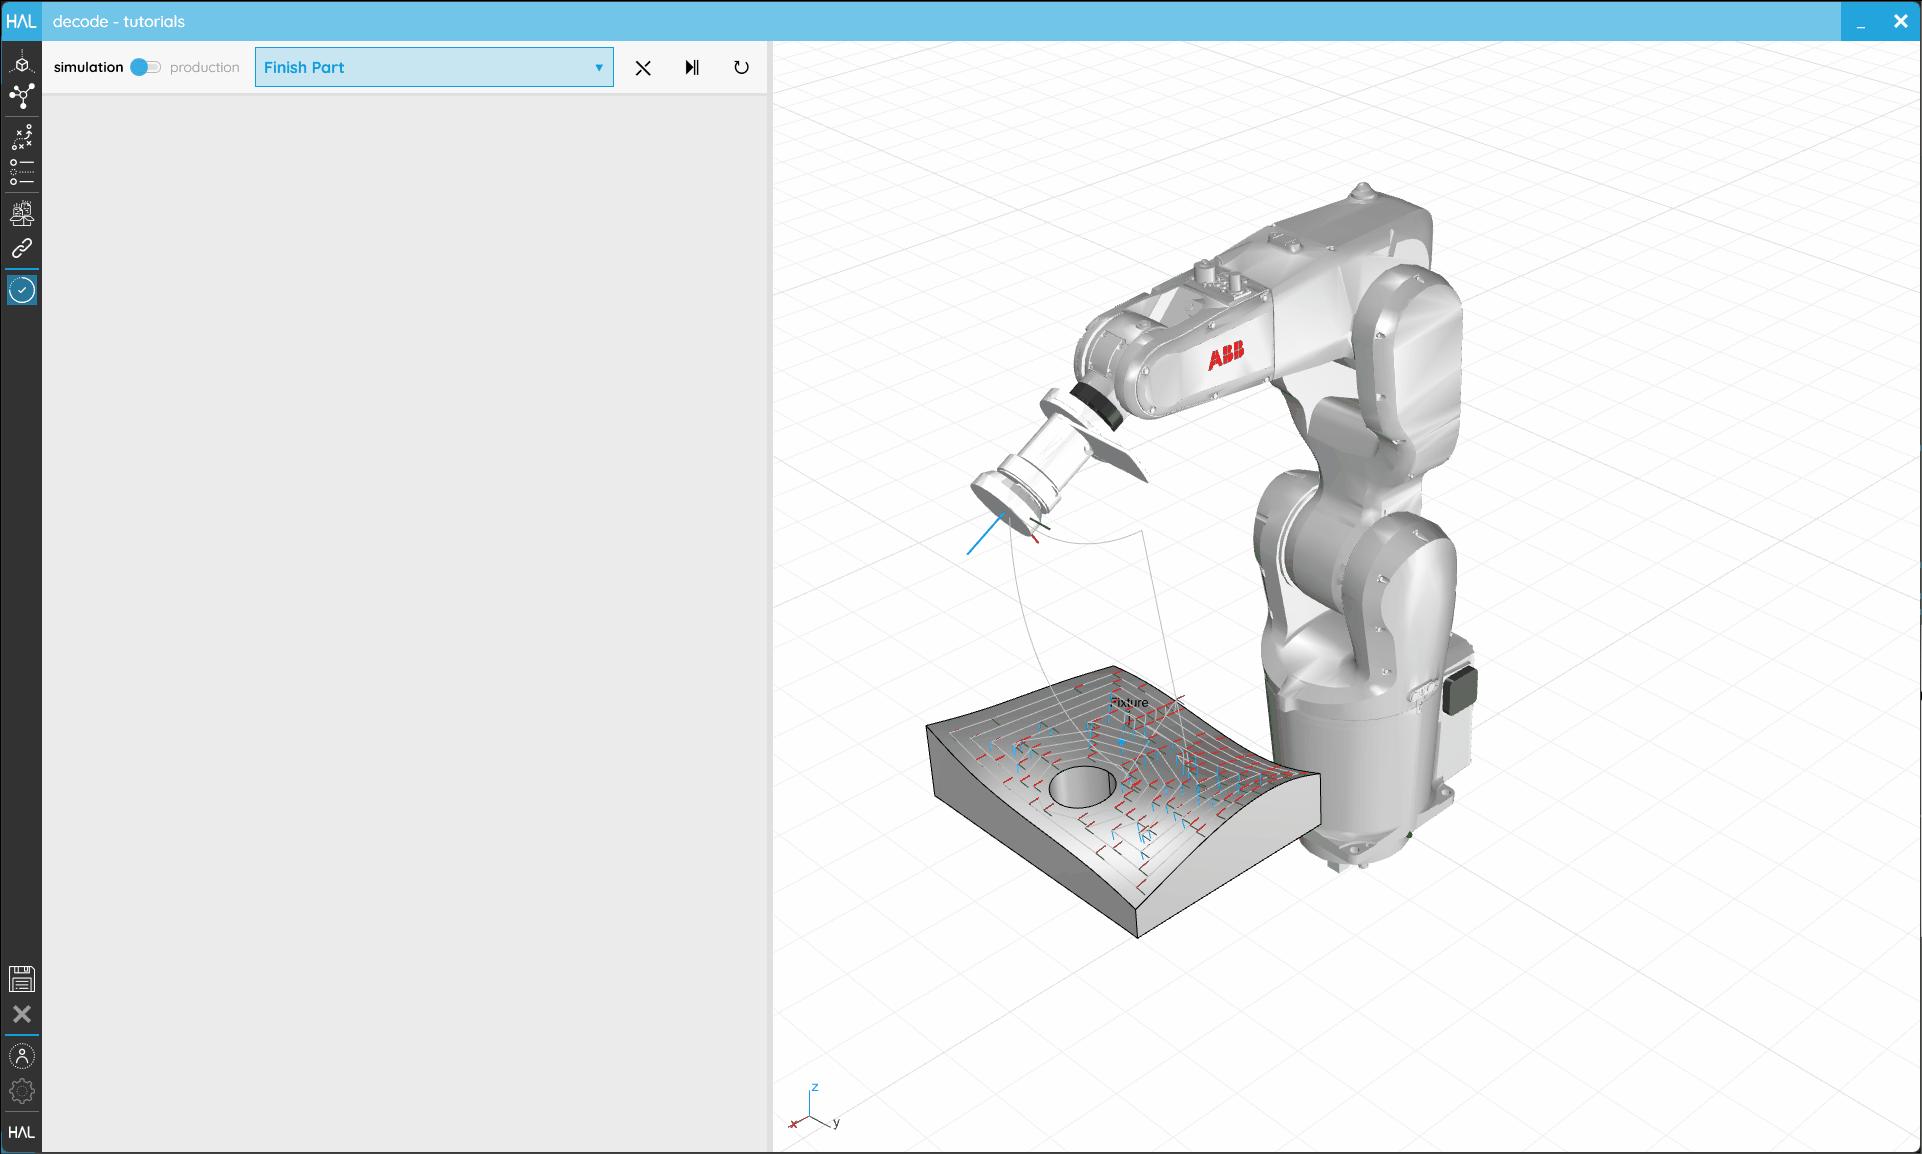
4.3. Run a Workflow
Objective:
In this tutorial we’ll see how to run an Operator Workflow in decode.
Requirements to follow along:
- HAL Robotics decode installed on a PC. See Installation if you need to install the software.
- An open project
- A Robot in the Scene
- A Controller in the Scene
- An Operator Workflow
Background:
Operator Workflows are a set of collaborative work instructions for the operator of a Cell, Robots and any other peripheral devices, like sensors, that need to be controlled or feed into the process. The Operator Workflow Executor is the only screen that an operator should need to interact with.
How to:
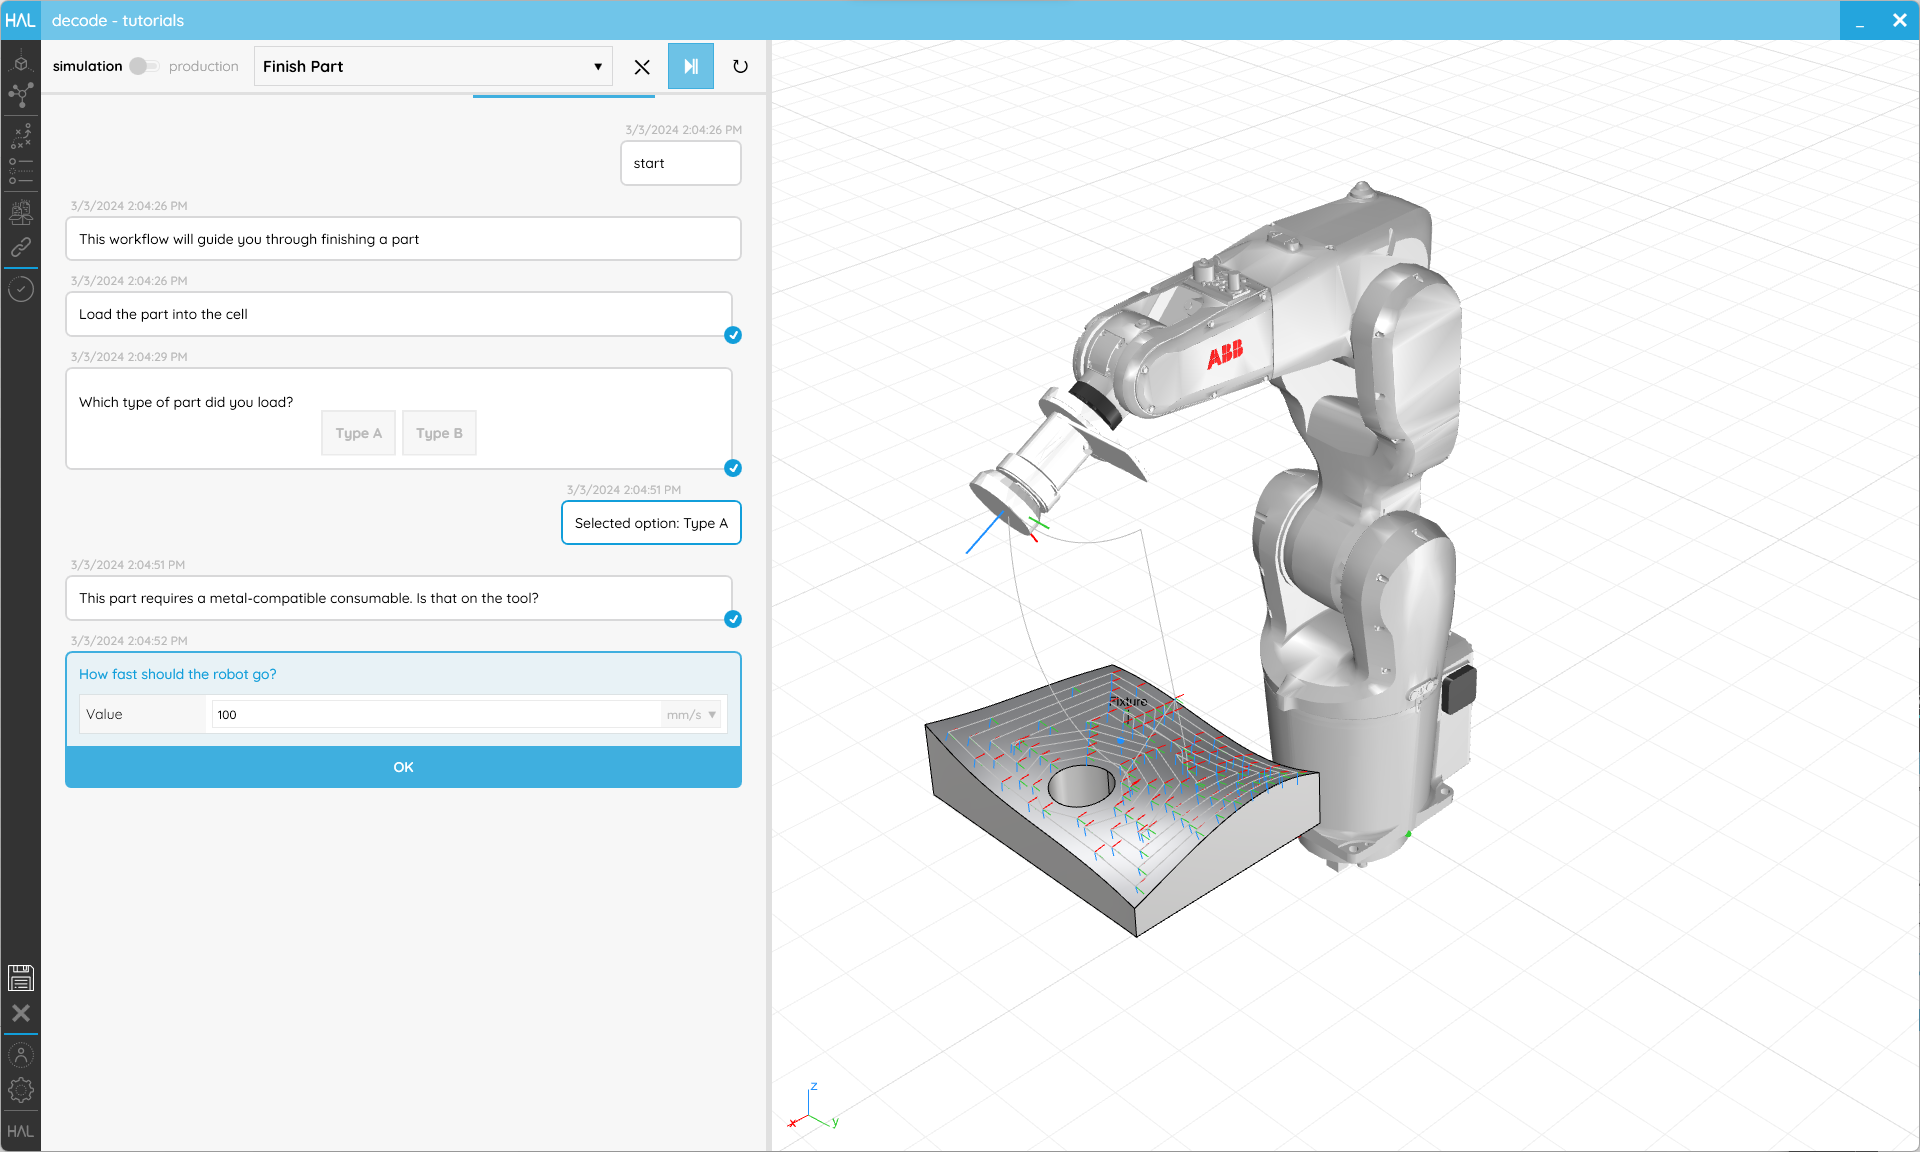
The Operator Workflow Executor screen has a few buttons at the top and nothing else, yet. The simulation/production mode toggle changes between running the virtual Robot or the real one. The Workflow selector allows the operator to choose which Workflow they want to run. The X resets the execution of a Workflow if for any reason the operator needs to start again or abort the current run. The play/pause button plays or pauses the execution and the circular arrows activates or deactivates the looping of the Workflow.
Once the Workflow is started Notifications, Confirmations, Inputs etc. will start appearing for the operator, as programmed in the Workflow.
 The operator will continue to get instructions and be able to adjust the process until their Workflow is complete.